
Welcome to InsuranceMenu! This guide can be used to help you create a group, generate & share proposals, manage group access, complete enrollment forms, receiving and uploading census data, manage open enrollment, and navigate the Home Screen.
Section 1 - Creating Groups and Generating & Sharing Proposals
Step 3: Sharing and Confirming Proposals
Step 4: Customizing your Proposal
Section 2 - Manage Group Access
Step 1: Inviting a Group Administrator
Step 2: Group Admin Creates their account
Step 3: Group Admin Confirming Proposals & Completing Forms
Section 3 - Completing Enrollment Forms
Step 1: Company Information Page
Step 2: Entering Employer Contribution Amounts
Step 3: Group Application, ACH or Other Forms
Section 4 - Receiving and Uploading Census Data
Step 1: Download, share, and complete census template
Step 2: Upload and Validate Census
Step 3: Check for errors and submit census
Section 5 - Managing Open Enrollment
Step 1: Managing Elections and Inviting Employees to Self-Enroll
Step 2: Tracking Enrollment Progress
Step 3: Ending Open Enrollment and Submitting the Group
Section 6 - Adding and Managing Teams
Step 1: Inviting team members to InsuranceMenu
Step 2: Creating Teams and Adding Team Members
Section 1 - Creating Groups and Generating & Sharing Proposals
With InsuranceMenu, you have the ability to create new groups for your potential customers and generate & share proposals in a matter of seconds. The following steps will walk you through this process, and share a few different ways a proposal can be shared with your group.
Step 1: Create a New Group
From the home screen, click Build Proposal.
In the Modal, enter a Group Name, and click Create New Group.
Select Agent of Record, and click Confirm New Group.
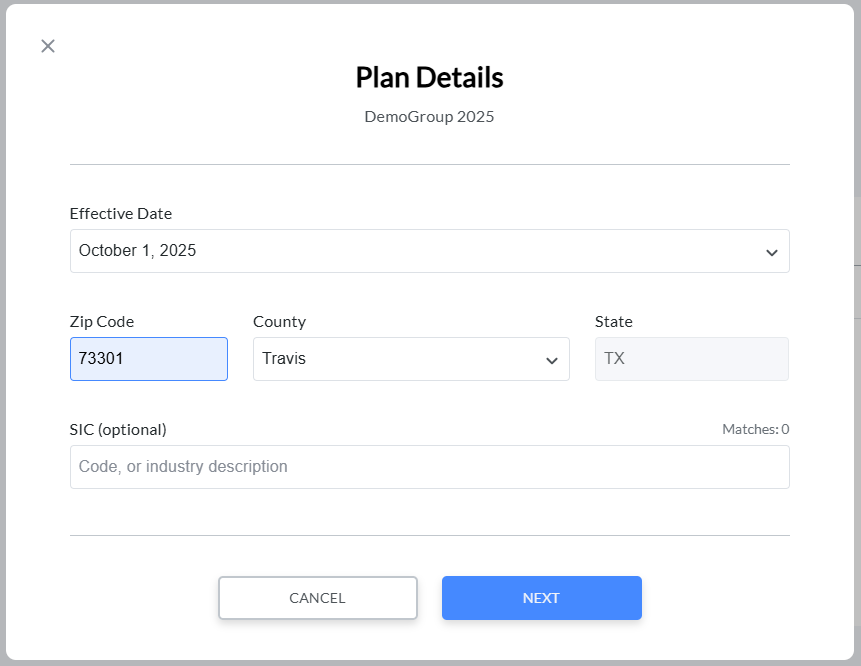
Then Enter Plan Details such as effective date and zip code. Click Next.
Step 2: Building a Proposal
Select which product you want to start browsing first.
Enter basic plan criteria such as group size, rate structure, contribution type, etc. Click Save.
Select your desired plans, and click Add to Proposal. Click Save Proposal.
Next, you can re-name your proposal, and click Save. The default proposal name will be the Group Name followed by the timestamp for when the proposal was saved.
Step 3: Sharing and Confirming Proposals
There are 3 ways to share a proposal with your client:
-
Invite a Group Administrator, usually an executive or HR team member from your client company, via InsuranceMenu. To do this, click Invite Group.
Another modal will then open where you can enter their name and email address, and they will receive a link to access the proposal. More detail on this process can be found in the Managing Group Access section.
-
Click Generate Proposal
From here, you can download a PDF or Excel to email to your client yourself.
-
You can also Share Proposal from this screen, which will send your contact a link to access the proposal through InsuranceMenu.
Here you can add a custom message or cc additional recipients without ever having to leave InsuranceMenu.
Step 4: Customizing your Proposal
InsuranceMenu has carrier specific default settings for what is included in a proposal. But, if you want to customize the proposal, you can do so here:
This will take you through a wizard where you can toggle on and off features like browsing/rating criteria, plan details, or rate sheets.
Section 2 - Managing Group Access
InsuranceMenu gives you the functionality to invite group administrators and other group members to review quotes, complete forms, and manage employee elections. This will give you the flexibility to digitally collaborate on deals and work through paperwork with your client, in real time!
This section will focus on inviting group administrators to review and confirm proposals and complete appropriate forms. We’ll cover Managing Elections in Section 5: Managing Open Enrollment.
Step 1: Inviting a Group Administrator
On the left side of the group home page, click the pencil icon by Group Access.
Enter the Group Administrator’s contact information including name and email address. Click + Invite.
You can enter additional group contacts if necessary here as well. If no one else needs to be invited, click Close.
Step 2: Group Admin Creates their account
The group user you invited will receive an email inviting them to setup their group administrator account on InsuranceMenu. They should click Complete Admin Profile.
After creating a password and agreeing to the InsuranceMenu Terms of Use and Privacy Policy, they will be able to log in to review quotes and complete the appropriate forms on InsruanceMenu.
Step 3: Group Admin Confirming Proposals & Completing Forms
To View a proposal, the group administrator will log in, and click on Continue next to a proposal. Then, they will select the plan they choose, and click Confirm.
At this point, they can start completing their company information and/or Employer Forms.
The great thing about this is, any changes they make will be updated and saved automatically, and will appear to you when you login next. This will allow you to collaborate with your clients on closing deals and completing paperwork, saving time, confusion, and re-work!
Section 3 - Completing Enrollment Forms
The ability to intuitively fill in forms is one of the key value drivers for InsuranceMenu! In this section, we’ll walk through how to complete the Company Information page, enter contribution amounts, and how to complete other forms such as a group application, ACH Payments form, or other form that may be required by your carrier.
All forms save in real time, so you can always close out and come back later without losing progress, or invite your group users to collaborate on these forms, while seeing each other’s progress in real time! Information on that process is in the previous section.
Step 1: Company Information Page
Open the group, and enter the Enrollment Checklist. Then, click Continue next to Company Information.
Then, work through the form to provide basic information about the company including contact names, expected number of employees, prior coverage, etc. What you enter here will be used to populate carrier paperwork like the group application or contract. This form vary from carrier to carrier.
Once complete, click the Complete Company Info button.
Step 2: Entering Contribution Amounts
Next you will enter the employer contribution amount, the amount or % that employers will contribute towards employees’ and their dependents’ premiums. The amounts entered here may impact the final rates for which the group qualifies after submission.
Click Continue next to Employer Contribution.
You may be able to enter either a percentage or a fixed dollar contribution amount. This will vary by carrier.
Once complete, click Complete Contributions.
Step 3: Completing Employer Forms
In this step you will complete the various forms required by your carrier. They may include a group application, payments authorization forms, e-signature, or anything else required from your carrier.
Click Continue next to Employer Forms.
Next you will see the list of forms that will need to be completed. Some forms may be required, others may be able to be bypassed or deferred until after submission. Others may become required depending on selections in the group application. For example, if you choose electronic payment method or ACH, then a payments authorization form will likely be required.
To get started, click Complete Form next to the form on which you want to start.
Fill in the form, and click Complete Form.
Repeat this step for all the required forms in the list. Once all forms have been completed, click Complete Forms.
Now that all forms have been completed, you can move on to the next step, completing and uploading a Census file for your group.
Section 4 - Receiving and Uploading Census Data
Step 1: Download, share, and complete census template
At this stage you are ready to start collecting enrollee information from your group. To get started, you will need to first download the census template through InsuranceMenu.
Click Continue next to Census Import from the Enrollment Checklist page.
Then click Download Template.
Now, you can share this template with your group contact via email, or work through it together to complete the required information including names, primary enrollee’s ssn, address information, etc. Census requirements will vary by carrier.
Step 2: Upload and Validate Census
Once the census template has been filled in, you will upload it through InsuranceMenu. To import your census, click Click to Import, and select your completed census file.
Then, click Check Data.
InsuranceMenu will check that the columns on the census contain the required information, that data is in the correct format, and will return a list of errors.
This page will show how many enrollees were imported, and point out any errors.
Once you get to 0 import errors, you are ready to submit the census.
Step 3: Check for errors and submit census
Click Submit Census.
Section 5 - Managing Open Enrollment
Step 1: Managing Elections and Inviting Employees to Self-Enroll
Now that your employees and other enrollees have been uploaded via the census, you are ready to start enrollment. There are 3 main ways to manage your group’s enrollment:
- Elections can be made via the census upload
- You and the group administrator can make employees’ elections through InsuranceMenu
- You can invite employees to self-enroll
This section will focus on options 2 and 3.
To make elections for your group’s enrollees, first click Continue next to Employee Elections in the Enrollment Checklist.
Then scroll down to the employee for which you want to make elections, and click Make Election. A drop down menu will open to select the plan in which they are enrolling. Here you or the group administrator can either elect or waive the coverage.
Also on this page, you have the ability to remove a subscriber, add & manage dependents, or update an employee profile. These would be helpful if there was a spouse or other dependent that was left off the census for some reason, or if there was a typo or missing information from the census.
You also have the ability to Select All employees, and make batch elections. If you click Select All, Batch Apply, and check either the plan name or waived, that election will apply to all enrollees in the group.
Another option would be to invite employees to self enroll. To do this, click on the checkbox next to the employee’s name. Then, scroll up to the top of the employees list, and click Invite to Self Enroll.
A popup will open with a list of the employees and their email addresses that you are inviting to self-enroll. From here you can either click Send Invite next to the individual employee to send them an invitation only. Or, to invite all selected employees, click Invite All Users.
After the invitation is sent, you can also use that page to reinvite an employee if necessary.
You will also see their status change to Invited. Once they have set up their account, the status will show as Registered.
Step 2: Tracking Enrollment Progress
InsruanceMenu also provides you with tools to track your group’s enrollment progress including how many folks have enrolled or waived coverage, have been invited to self enroll, and how many have yet to enroll.
At the top of the screen there are a few tiles. In this example, we just have the General tile and Dental tile. If we had additional products on the proposal, vision for example, there would be a tile for those products as well.
The General tile tracks all the stats for the full group enrollment. Total represents the number of employees in the group. Elected shows how many people have made an election, to either enroll or waive coverage. Waived tracks how many people have waived coverage. Invited tracks the number of employees that have been invited to self enroll, and Registered tracks the number of employees that have set up their accounts to self-enroll.
The Dental tile tracks the number of enrollees in each tier, or enrollment bucket. It also shows the estimated monthly cost based on the current number of people that are enrolling in coverage.
All of these totals will update live in real time as your group’s enrollees make their elections. After a group has finished their elections, these tiles may look like this.
We can see that some folks have chosen to enroll in coverage, some are waived, and the number of enrollees in each age bucket, as well as the estimated monthly cost!
Step 3: Ending Open Enrollment and Submitting the Group
When you are ready to end the enrollment period, click End Open Enrollment at the bottom of the Employee Elections page.
A warning page will appear warning that any employees who received an invitation to self enroll will no longer be able to access the elections page, those who have not made elections will automatically be set to Waived, and summarizing the election totals one more time.
When you are ready, click End Open Enrollment.
The final step is to submit the group. From the Enrollment Checklist, click Continue next to Review & Submit.
A final check is done comparing all the information that was entered during the enrollment process and forms completion against your carrier’s underwriting rules. The final rates will be updated if necessary and displayed before finally submitting the group. This page will vary from carrier to carrier based on their underwriting rules.
When everything is correct, click Submit.
A warning window will appear, advising that submitting the group will generate the necessary documents. When you are ready, click Submit Enrollment.
Section 6 - Adding and Managing Teams
Step 1: Inviting team members to InsuranceMenu
First, you’ll want to set up your agents, support reps, HR team, and anyone else that will be interacting with InsuranceMenu. To add and invite your team members, first click on Manage Users and Teams.
Then, click Invite Agents.
A window will open where you can enter their name and contact information.
If the person you are inviting should be available as an agent of record, you will also need to add their NPN.
Next, you can add the new agent/user to any team that you currently have active.
Please note, not all teams are active on all carriers. You may also need to add relevant teams for your agency.
Step 2: Creating Teams and Adding Team Members
There are a few key teams that you will want to set up for your agency:
- Admin team - Members of this team will have an agency wide view of your book of business. They will have the ability to quote business on behalf of other agents, as well as add or deactivate team members. Usually, an agency's Support or Operations team members are added here so they can easily support agents that are out there selling.
- Broker Support team - These are specifically the Account Mangers or CSRs that are supporting sales. They have the ability to generate quotes on behalf of the agents they support, as well as receive some key notifications around proposals and group submissions.
- User Access team - This is where you would add an HR or IT manager that onboards new employees and manages their access to different tools. These folks have the ability to add and deactivate users on InsuranceMenu.
For a more complete and detailed list of available teams and their functionality, click here.
Once your agents are invited and teams are set, you are ready to start quoting and enrolling groups through InsuranceMenu!
If you still need help, please don't hesitate to reach out. Please click here to schedule an onboarding session with a member of our Customer Success team.
Comments
0 comments
Please sign in to leave a comment.